


Docker Hub*: It's like a Repository for Docker Images, similar to GitHub where we store the code of the project, whereas, Docker Hub, stores the Images that are created from those program files.*
Docker push: This is used to push Docker images to Docker hub. Before we can push we need to tag the image, that we want to push.
docker tag <image_name> <dockerhub_username>/<image_name>
eg, docker tag node-app:latest testloginapurv/node-app:latest

docker push <dockerhub_username>/<image_name>
eg, docker push testloginapurv/node-app:latest
Docker Pull: As we know while we work on GitHub, we can clone or pull codes from GitHub, similarly we can pull the images that we pushed in the Docker hub.
If there are no images in our system, that we are looking for, then it will pull from the Docker HUB.
docker rmi <image_name>
eg, docker rmi  docker rmi node-app:latest

docker pull  testloginapurv/node-app:latest
Docker Volume:
So when your container is running, you can access all the data, but when that container dies or is removed, that data becomes inaccessible, then the data inside the container is gone
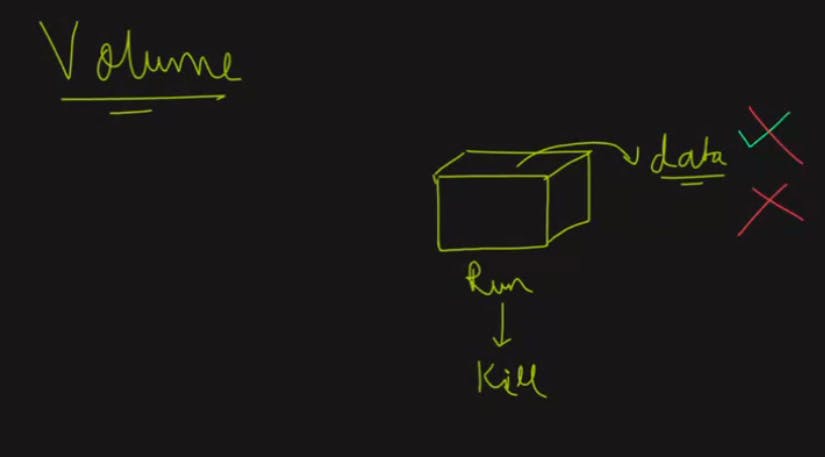
The solution to this problem is to Bind your computer's storage to the container. But the catch is only to bind the WORKING DIRECTORY, else if we take the complete container, there will be lots of space consumption, in our local system. We will only be storing the folder where the actual data/images/ files are. When a new container is created this will get attached or Bind to volumes where actual data is stored from the previous container.

Creating volume
docker volume create --name <name_of_volume> --opt type=<type_of_volume> --opt device=<location_of_volume_folder> --opt o=bind

docker volume create --name django-todo-volume --opt type=none --opt device=/home/Apurv/docker-demo/volumes/django-app --opt o=bind

 Note: The "bind" option indicates that the volume
        should be mounted as a bind mount. A bind mount is a way
        to mount a file or directory from the host machine into a container.
Now run a container using any image


Now the Container is running, try adding a few items to this and then Kill the Container


docker ps
docker kill <Container_id>
docker run -d -p <hostport>:<container port> --mount source=<container_volume>,target=<app_data_folder>  <name_of_image>

You will again see the same data,

This is how Docker volumes are used, where even though the Container gets killed, the data will persist and the next container will have the same data
Docker Network
How can we execute using Docker Network or More (Multi-Tier Application)?
Two running Containers do not communicate with each other. To make them communicate with each other we need to create a Network between them
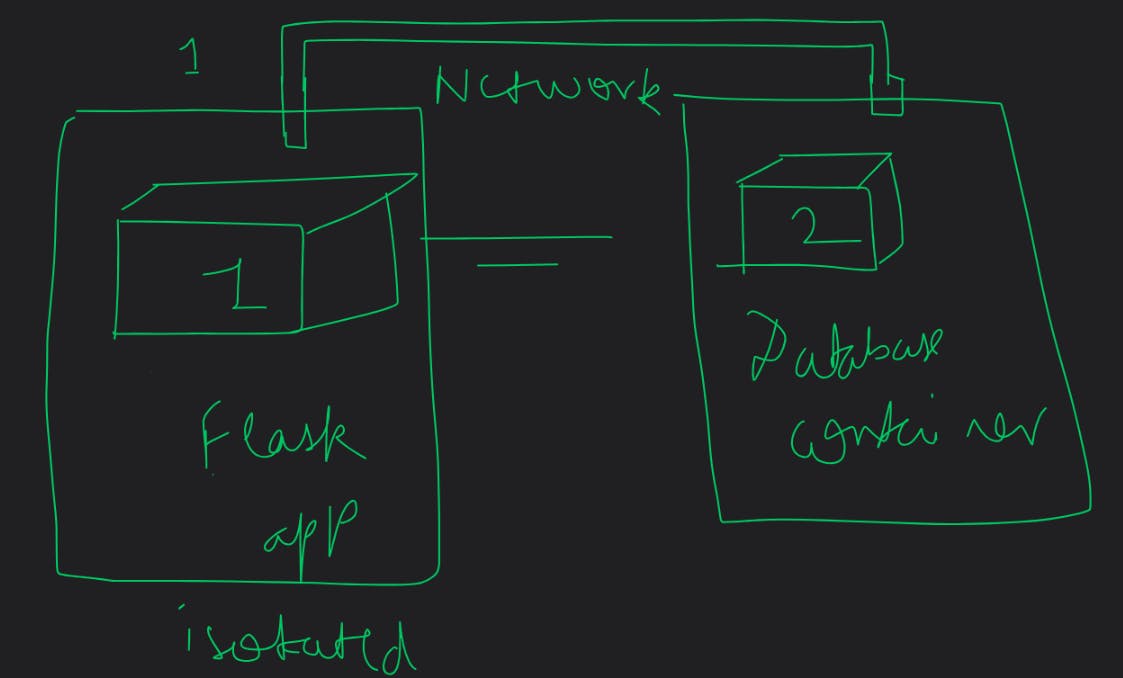
If we run 2 container MySQL and a two-tier Flask app, and give the MySQL as a backend it won't work, because there is no network established between of them to communicate


It is basically looking for the database server, which is there but not connected. So In case we try and give the MySQL container name while running the Flask application, it might work

However, we still see, it's not able to find the container

Here comes the Docker Network which will create and establish the Network between both of the Container.
docker nwetwork ls

To resolve this problem we definitely need to create a network and give the network to be used, while running the container
docker network --create


docker run -d -p <hostport>:<containerport> -e MYSQL_ROOT_PASSWORD=<password> -e MYSQL_DATABASE=<DBname> -e MYSQL_USER=<username> -e MYSQL_PASSWORD=<userpassword> --name <Contianer name> --network <Network_name> <image name>
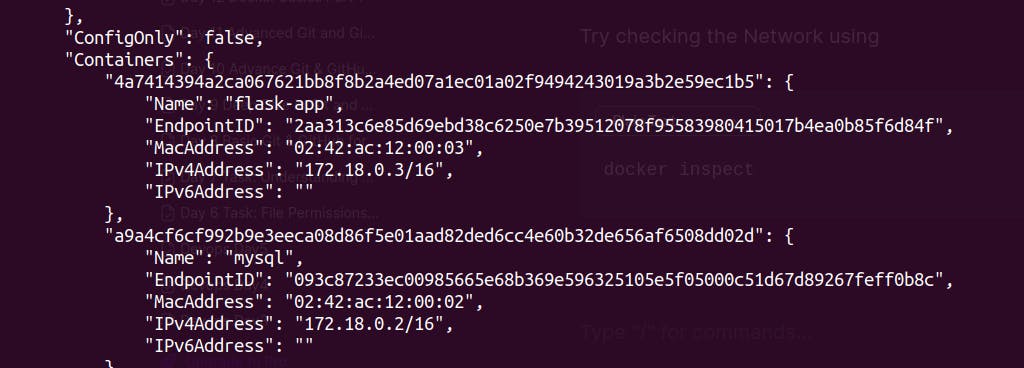
Try checking the Network using
docker inspect

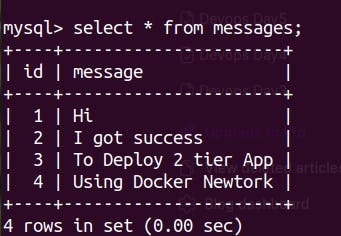
We can see the data in the Backend as well
Docker system prune:: to remove dead containers